Minute Homemade Peanut Butter: Just Peanuts, No Added Oil
Imagine a world where your favorite pantry staple, peanut butter, is made from a single ingredient. No mystery oils, no added sugars, no preservatives – just the pure, unadulterated goodness of peanuts. This isn't a fantasy; it's the reality of making your own homemade peanut butter, and it's surprisingly simple. For anyone wondering
how to make peanut butter that’s healthier, fresher, and incomparably delicious, you've come to the right place. Get ready to transform humble peanuts into a creamy, dreamy spread in minutes.
The revelation that peanut butter could be made solely from peanuts was a game-changer for many. It seems almost too simple to be true – just blend peanuts, and *poof*, you have peanut butter? Yes, it absolutely works, and the results are nothing short of magical. Beyond the sheer novelty, crafting your own peanut butter offers a multitude of benefits, from superior taste to complete control over ingredients. It's a quick, rewarding kitchen project that you'll wish you'd discovered sooner.
Why DIY Peanut Butter is the Best Way to Spread
Before we dive into the nuts and bolts (pun intended!), let's explore why making your own peanut butter is such a brilliant idea. Store-bought options, while convenient, often contain unnecessary additives like hydrogenated oils, excessive sugar, and preservatives to extend shelf life and enhance texture. When you make it yourself, you strip away all the extras, leaving you with a product that is:
*
Pure & Wholesome: The ultimate control over ingredients means you can avoid unwanted oils, sugars, and sodium, focusing purely on the natural goodness of peanuts. This makes it an excellent choice for a healthy, protein-rich snack.
*
Economical: Buying raw or roasted peanuts in bulk is often more cost-effective than repeatedly purchasing premium, single-ingredient peanut butter brands. Over time, the savings can add up!
*
Freshness You Can Taste: There’s no comparison to the vibrant, nutty flavor of freshly made peanut butter. The aroma alone is enough to convert you.
*
Endlessly Customizable: From texture to flavor, you dictate everything. Want it extra crunchy? Prefer a hint of cinnamon or a touch of honey? The possibilities are limited only by your imagination.
*
Empowering & Fun: There's a certain satisfaction that comes from creating something so delicious and fundamental from scratch. It’s an easy project that yields impressive results.
For a deeper dive into the advantages, you might find our article
Why Homemade Peanut Butter is Better: Easy, Cheap & Delicious particularly insightful.
The Simple Steps to Perfect Peanut Butter
Making homemade peanut butter is less of a recipe and more of a process, driven primarily by a powerful kitchen appliance. Here's a comprehensive guide on
how to make peanut butter with just peanuts and a machine.
1. Pick Your Powerhouse Appliance
The secret to transforming peanuts into butter lies in friction and speed, which means a robust machine is non-negotiable. You'll need either:
*
A High-Speed, Full-Size Food Processor: This is generally the preferred choice due to its wide base and powerful motor, which handles the thick consistency better.
*
A High-Speed Blender (e.g., Vitamix, Blendtec): While possible, some blenders may struggle more with the thick stages and require more frequent scraping. Ensure yours is designed for heavy-duty blending.
Avoid using mini food processors or blenders on their last leg. This process requires a motor that can run continuously for several minutes without overheating.
2. Select Your Peanuts
While "peanut butter" suggests only peanuts, the type you choose matters for the final flavor and texture.
*
Unsalted Peanuts: This is crucial. Starting with unsalted peanuts allows you to control the sodium level, adding salt to taste at the very end.
*
Shelled Peanuts: Of course, you'll want shelled peanuts. Most readily available peanuts for cooking are already shelled.
*
Raw vs. Roasted: You can start with either. Raw peanuts will result in a lighter, more natural flavor, while pre-roasted peanuts (like dry-roasted) offer a deeper, more intense nutty profile. If using raw, don't skip the toasting step below.
*
Peanut Variety: Runner peanuts are common for their uniform size and high yield, but Virginia or Spanish varieties can also be used, each imparting slightly different flavor notes.
A good starting point is about 2 cups of peanuts, which will yield approximately 1 cup of peanut butter. This quantity is ideal for most standard food processors without overwhelming the motor.
3. Toast Your Nuts for Ultimate Flavor
This step is optional if you're using pre-roasted peanuts, but highly recommended for raw peanuts and even beneficial for lightly roasted ones. Toasting significantly enhances the flavor and helps release the natural oils, making the blending process smoother.
*
Skillet Method: Heat a large, dry skillet over medium heat. Spread the peanuts in a single layer. Toast for 5-8 minutes, stirring frequently, until they are fragrant and lightly golden-brown. Be careful not to burn them!
*
Oven Method: Spread peanuts in a single layer on a baking sheet. Roast at 350°F (175°C) for 8-10 minutes, stirring halfway through, until aromatic and lightly browned.
Once toasted, allow the peanuts to cool slightly before proceeding. This prevents overheating your machine and helps achieve a better texture.
4. The Blending Transformation: From Nut to Butter
This is where the magic happens! Transfer your slightly cooled, toasted peanuts into your high-speed food processor or blender.
*
Stage 1: Crumbly (1-2 minutes)
* Initially, the peanuts will break down into coarse crumbs, resembling ground nuts. Scrape down the sides of the bowl as needed.
*
Stage 2: Pasty (2-4 minutes)
* The crumbs will start to clump together, forming a thick, pasty consistency. It might look dry and like it'll never turn into butter, but be patient! Keep scraping. The natural oils are beginning to be released.
*
Stage 3: Thick Butter (4-6 minutes)
* The paste will smooth out significantly, becoming a very thick, almost dough-like ball of butter. It will still be quite stiff.
*
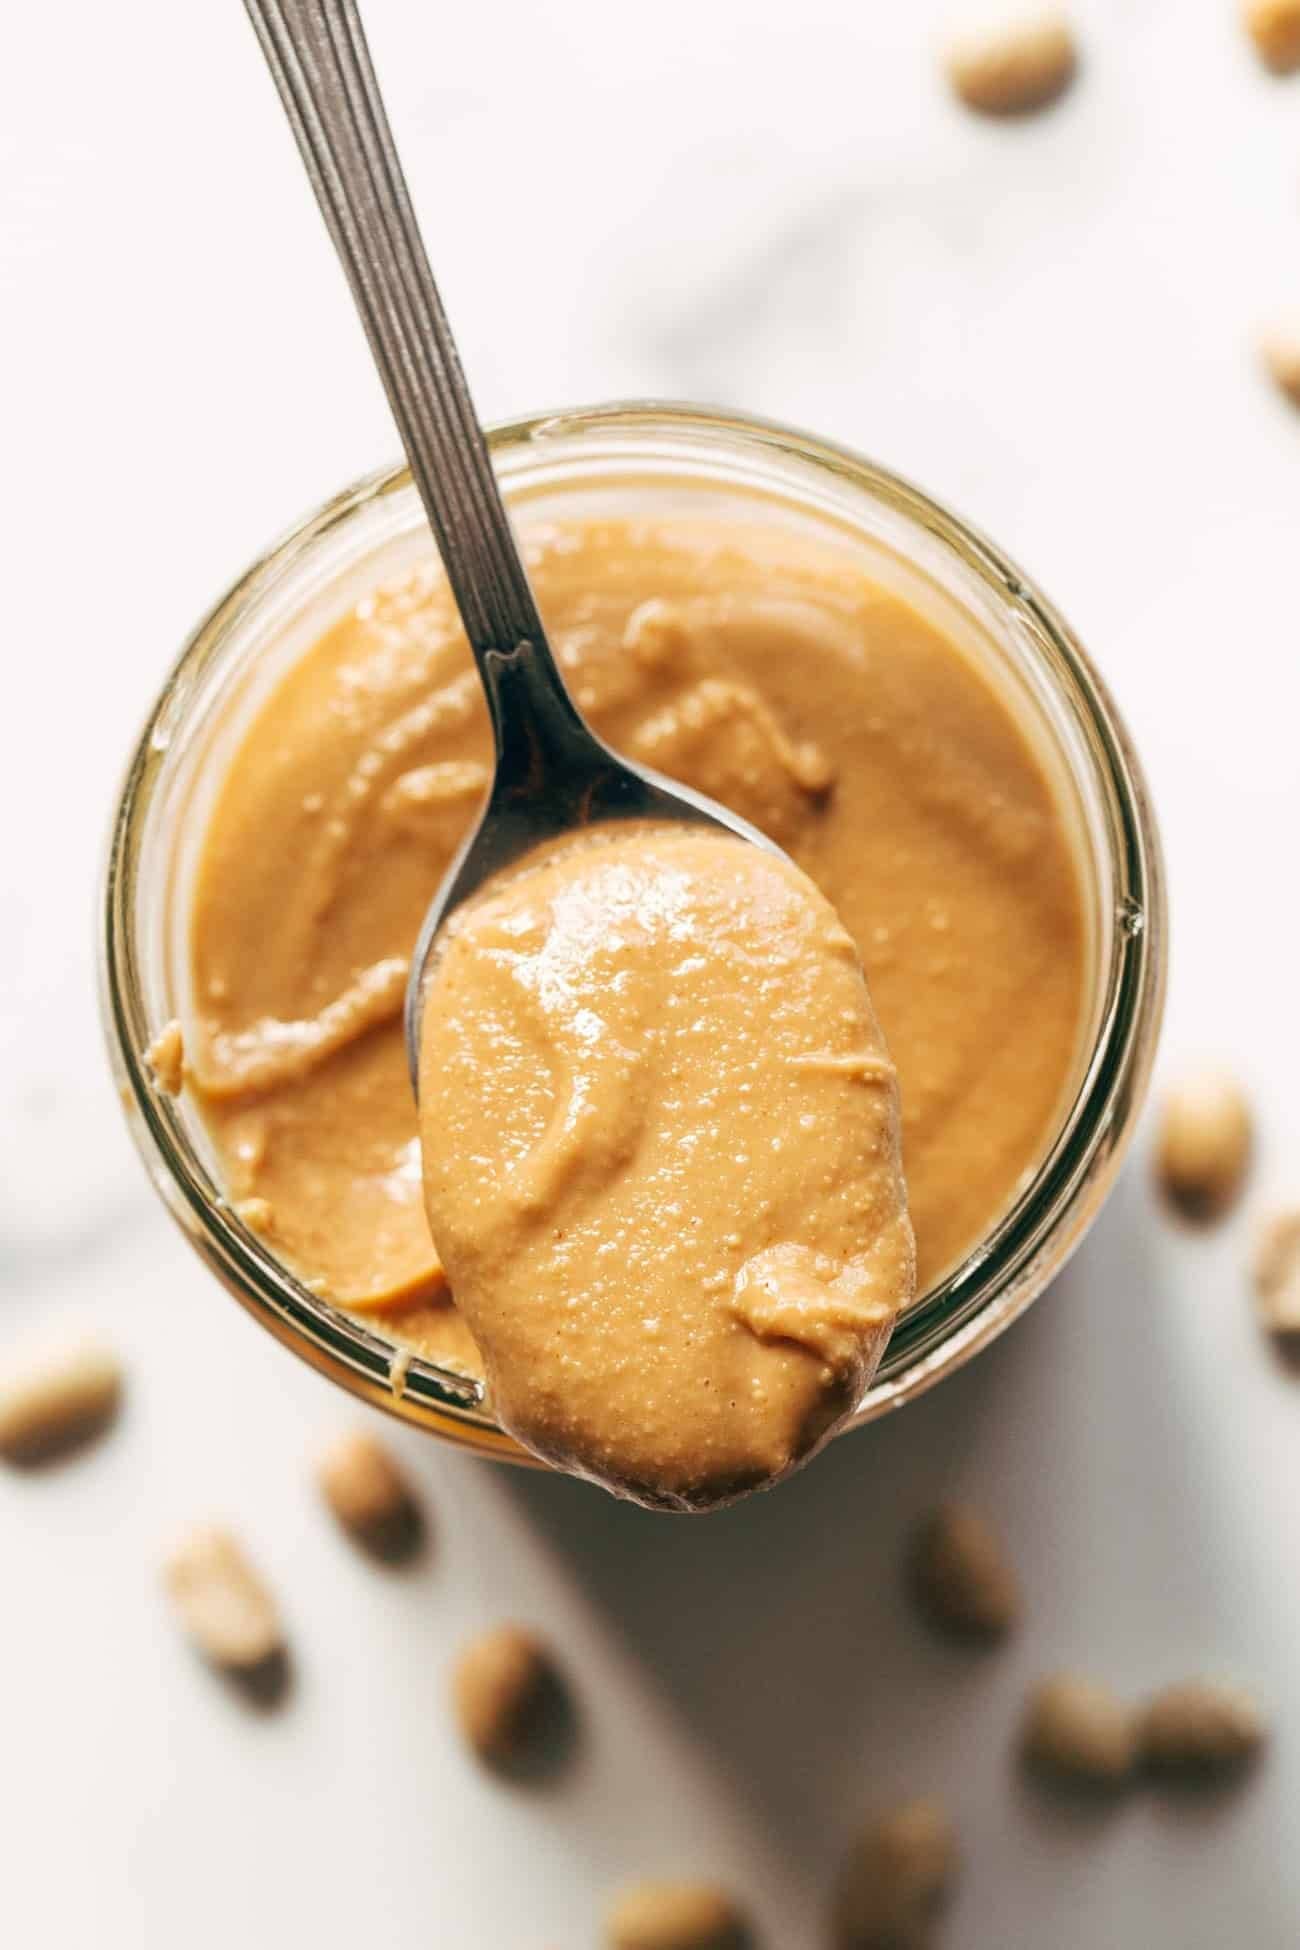
Stage 4: Creamy & Smooth (6-10 minutes, or longer)
* With continued blending, the oils will fully release, and the butter will transform into a glossy, pourable, creamy consistency. This is the moment of truth! For extra-smooth butter, you might need to blend for another minute or two beyond this stage.
Throughout the process, especially during the thicker stages, you'll need to stop the machine and scrape down the sides of the bowl with a spatula every minute or two. This ensures all the peanuts are evenly processed and prevents the motor from getting bogged down. If your machine starts to feel warm, give it a short break to cool down before resuming.
Customizing Your Homemade Peanut Butter
Once you have your basic, beautiful peanut butter, the fun truly begins. This is where you can make it uniquely yours. For more ideas on customization, check out
Make Your Own Peanut Butter: Easy Steps & Customization Tips.
*
Achieving Your Perfect Texture:
*
Creamy: Simply continue blending until it reaches your desired silky smoothness.
*
Crunchy: Once you have your creamy base, add about ¼ to ½ cup of *chopped* roasted peanuts back into the food processor and pulse a few times until just combined. Don't overmix, or you'll lose the crunch!
*
Flavor Enhancements (add at the very end):
*
Salt: Start with ¼ teaspoon of fine sea salt per cup of peanut butter and add more to taste. It dramatically enhances the nutty flavor.
*
Sweetener: A teaspoon or two of honey, maple syrup, or a natural sugar alternative can be added if you prefer a sweeter profile. Blend until fully incorporated.
*
Spices: A pinch of cinnamon, a dash of vanilla extract, or even a tiny amount of cardamom can elevate the flavor.
*
Chocolate Peanut Butter: Add 2-3 tablespoons of cocoa powder (for unsweetened, add a bit more sweetener) or melted chocolate chips for a decadent treat.
Storing Your Freshly Made Creation
Homemade peanut butter, free from artificial preservatives, has a shorter shelf life than its store-bought counterparts.
*
Room Temperature: Store in an airtight container in a cool, dark place for up to 1-2 weeks. Separation of oils is natural; just give it a good stir before serving.
*
Refrigerator: For longer storage, keep it in the refrigerator for up to 3-4 weeks. The cold will make it much firmer, so you might need to let it sit out for a few minutes or warm it slightly to achieve a spreadable consistency.
Troubleshooting Common Peanut Butter Hurdles
While making peanut butter is straightforward, you might encounter a few minor issues:
*
It's too dry/thick: This usually means you haven't blended long enough. Keep going! The oils will eventually release. If after 10-15 minutes it's still stubbornly thick, you can add a tiny amount (½-1 tsp) of a neutral oil like peanut oil or coconut oil to help it along, but usually, patience is the key.
*
My machine is getting hot: Stop and let it rest for 5-10 minutes. Overheating can damage your appliance.
*
It won't turn creamy: Ensure your peanuts were adequately toasted. Toasting helps break down cell walls and release oils. If using raw peanuts and skipping toasting, it will take significantly longer.
Conclusion
The journey from a handful of peanuts to a jar of luscious, homemade peanut butter is a truly rewarding one. Not only do you get to enjoy a product that is cleaner, fresher, and bursting with natural flavor, but you also gain the satisfaction of creating something wonderful with your own hands. Armed with just a high-speed machine and a bag of peanuts, you now know precisely
how to make peanut butter that will redefine your expectations of this beloved spread. So go ahead, give it a try – you might just discover your new favorite kitchen endeavor!