Why Homemade Peanut Butter is Better: Easy, Cheap & Delicious
For many, peanut butter is more than just a spread; it's a nostalgic staple, a protein-packed snack, and a versatile culinary ingredient. But have you ever considered making it yourself? What might seem like a gourmet endeavor is, in reality, one of the simplest, most rewarding kitchen projects you can undertake. Forget the store-bought jars with their often-questionable ingredient lists; diving into the world of homemade peanut butter is a game-changer, offering unparalleled freshness, flavor, and complete control over what you consume.
The journey to making your own peanut butter often begins with a moment of revelation: the understanding that peanut butter is, at its core, just peanuts. This simple truth unlocks a world of possibilities, transforming a common pantry item into a customizable, wholesome delight. From that initial "aha!" moment, the path to a healthier, more delicious spread is surprisingly straightforward, embodying everything we love about home cooking: it’s easy, incredibly cheap, and utterly delicious.
The Irresistible Appeal of Making Your Own Peanut Butter
Why bother with homemade when store shelves are overflowing with options? The reasons are compelling and manifold, extending far beyond mere novelty.
Unmatched Simplicity and Speed
One of the most surprising aspects of making peanut butter at home is just how *easy* it is. Seriously. The process largely involves one simple step: blending. With the right equipment, the machine does almost all the work, transforming humble peanuts into a luscious spread in mere minutes. It's a quick win for your culinary confidence and your taste buds. Many enthusiasts find that they can whip up a fresh batch in under
5 minutes, making it a perfect last-minute addition to your pantry.
Budget-Friendly Goodness
Comparing the cost of a bag of raw peanuts to a jar of premium, all-natural peanut butter reveals a significant saving. Buying peanuts in bulk can drastically cut down on your grocery bill, making homemade peanut butter a remarkably economical choice. This financial benefit is even more pronounced if you're a high-volume consumer, like families with active kids or fitness enthusiasts who rely on nut butters for their nutritional punch. You get a superior product without the premium price tag.
Purity and Nutritional Control
Perhaps the most crucial benefit is knowing *exactly* what goes into your peanut butter. Many commercial brands contain added sugars, hydrogenated oils, and preservatives to enhance shelf life or texture. When you make it yourself, you can completely eliminate these undesirable additives. Your homemade version can be just peanuts, or peanuts with a touch of sea salt – that’s it. This makes it an excellent choice for those with dietary restrictions, allergies, or anyone simply looking to reduce their intake of processed ingredients. You're in control of the sodium content, the sweetness, and even the type of oil (or lack thereof) in your spread.
Endless Customization Possibilities
This is where the fun truly begins. Store-bought peanut butter offers limited choices: creamy or crunchy, maybe honey-roasted. Homemade opens up a universe of flavors and textures. Do you prefer it extra creamy, or with a substantial crunch? You decide. Want a hint of sweetness? Add a drizzle of honey, maple syrup, or dates. Craving something unique? Experiment with spices like cinnamon, cardamom, or even a touch of chili powder for a savory kick. You can even create gourmet blends by adding cocoa powder for a chocolate peanut butter experience, or a dash of vanilla extract for aromatic richness. The possibilities are truly limitless, making every batch an adventure. For more ideas on how to personalize your spread, check out our guide on how to
Make Your Own Peanut Butter: Easy Steps & Customization Tips.
Essential Equipment for Perfect Peanut Butter
While the process of making peanut butter is simple, having the right tools can make all the difference in achieving that perfectly smooth, creamy consistency.
The Power of a High-Speed Appliance
The star of the show for homemade peanut butter is undoubtedly your blending machine. You’ll need a robust appliance capable of handling the task of breaking down nuts and releasing their natural oils.
*
High-Speed Food Processor: A full-size, high-speed food processor is an excellent choice. Its wide bowl and powerful blade are ideal for continuously processing nuts through all their stages, from coarse crumbs to a smooth, flowing butter. Ensure your food processor is in good working order; a weak motor might struggle and potentially overheat.
*
High-Speed Blender (e.g., Vitamix): A high-speed blender, like a Vitamix or similar professional-grade model, can also achieve fantastic results. These blenders are designed to handle tough ingredients and generate enough friction to efficiently break down the peanuts. However, you might need to stop and scrape down the sides more frequently with a blender compared to a food processor due to its narrower base.
Avoid using mini food processors or blenders that aren't specifically designed for heavy-duty tasks. These smaller machines may not have the power or capacity to create truly smooth peanut butter and could even be damaged in the process. A strong motor is crucial for generating the heat and friction necessary to transform dry peanuts into a liquid spread.
Mastering How to Make Peanut Butter: Your Step-by-Step Guide
Now that you understand the "why," let's dive into the "how to make peanut butter" with practical, actionable steps.
1. Selecting Your Peanuts
The foundation of great peanut butter is, naturally, great peanuts.
- Type: Opt for raw, shelled, unsalted peanuts. While you can start with pre-roasted peanuts, roasting them yourself allows for better flavor control. If using peanuts with skins, blanched peanuts (skins removed) will yield a smoother butter.
- Quantity: A good starting point is 2 cups of peanuts, which typically yields about 1 cup of peanut butter. This amount is usually sufficient for most food processors and blenders to work efficiently without being overloaded or underloaded. You can easily scale up or down once you get the hang of it.
2. Toasting for Optimal Flavor and Texture
This step is optional but highly recommended. Toasting your peanuts intensifies their natural nutty flavor and helps release their oils, which is crucial for achieving a smooth consistency.
- Skillet Method: Heat a large, dry skillet over medium heat. Spread the peanuts in a single layer. Toast for 5-8 minutes, stirring frequently, until they are fragrant and lightly golden brown. Be careful not to burn them!
- Oven Method: Preheat your oven to 350°F (175°C). Spread the peanuts in a single layer on a baking sheet. Roast for 8-10 minutes, stirring halfway through, until aromatic and lightly browned.
Let the peanuts cool slightly before proceeding. This prevents your machine from overheating and helps maintain the flavor.
3. The Blending Process: A Transformation in Stages
This is the core of how to make peanut butter. Pour your toasted (and cooled) peanuts into your food processor or high-speed blender. Now, blend! Be patient, as the peanuts will go through several distinct stages:
- Coarse Crumbs (30-60 seconds): The peanuts will first break down into small, dry crumbs, resembling coarse sand.
- Sticky Ball/Paste (1-3 minutes): As blending continues, the natural oils begin to release, and the crumbs will clump together into a sticky ball or thick paste. It might look like it won't ever become smooth – keep going!
- Thick Butter (3-5 minutes): The paste will start to loosen, becoming a thick, slightly grainy butter. At this stage, you'll want to scrape down the sides of the bowl frequently to ensure even processing.
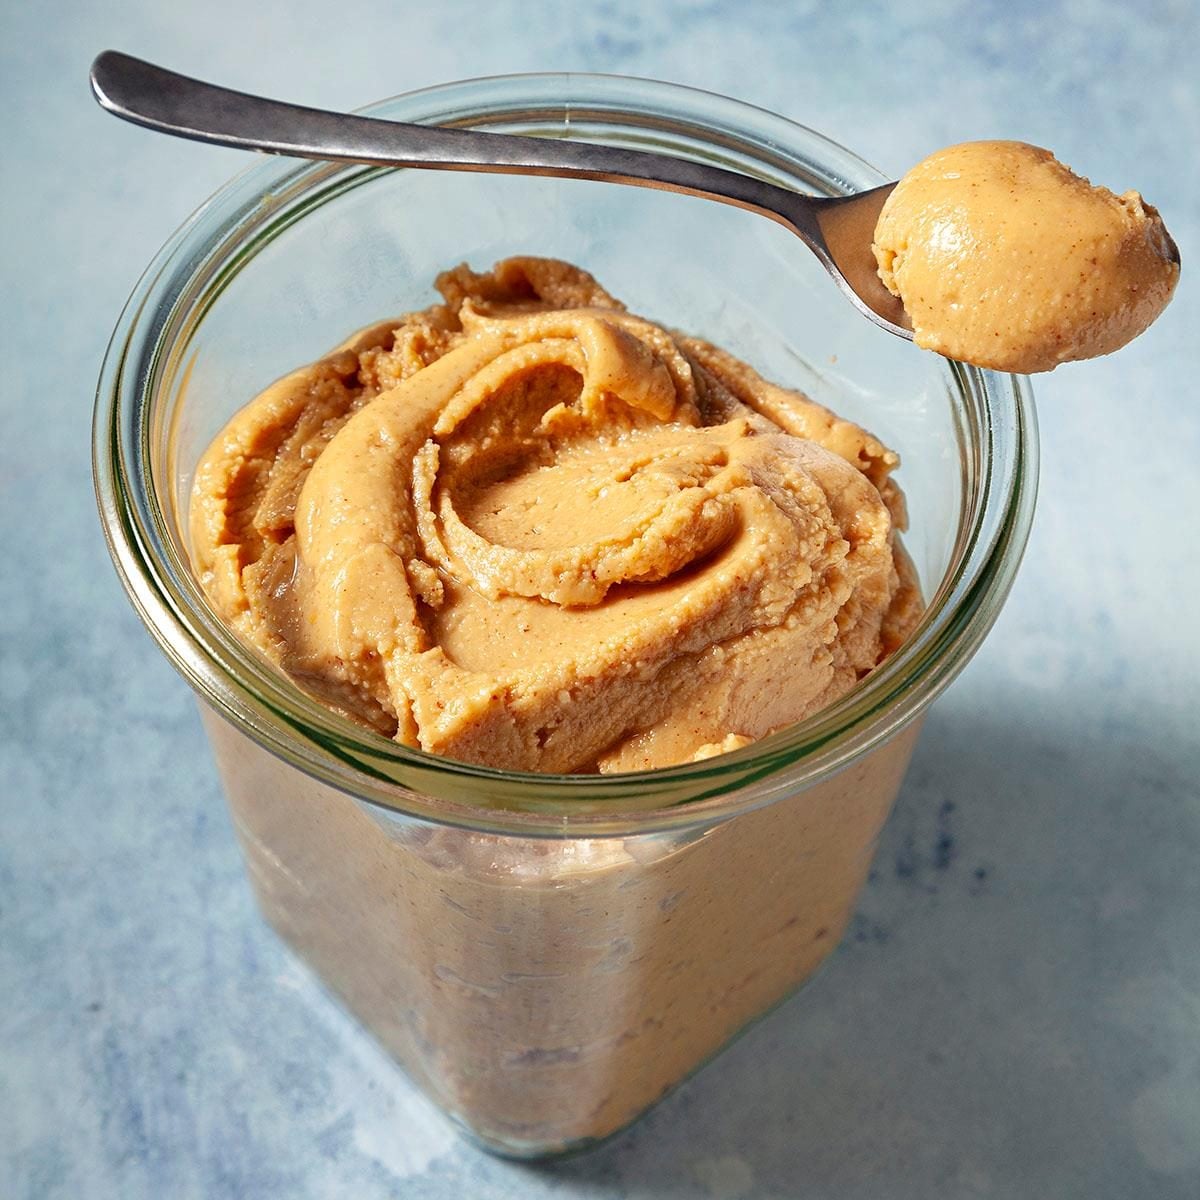
- Smooth, Creamy, and Flowing (5-8 minutes, or longer): Continue blending, and magically, the butter will transform into a wonderfully smooth, creamy, and pourable consistency. The friction from the blades generates heat, further releasing the oils and creating that desired texture. This final stage can sometimes take a few extra minutes, so don't give up!
Tip: If your machine seems to be struggling or overheating, pause for a minute or two to let it cool down, then continue blending.
4. Customization and Flavor Enhancements
Once your peanut butter reaches your desired consistency, it's time to personalize it.
- Salt: Add a pinch of sea salt to taste. Salt brightens the flavor of the peanuts beautifully.
- Sweetness: For a touch of sweetness, consider adding a teaspoon or two of honey, maple syrup, agave nectar, or even a few pitted dates while blending.
- Crunchy Peanut Butter: If you prefer crunchy, once your butter is almost smooth, add a handful of reserved whole or coarsely chopped roasted peanuts and pulse a few times to incorporate.
- Flavor Variations: Experiment with a teaspoon of vanilla extract, a sprinkle of cinnamon, a tablespoon of cocoa powder for chocolate peanut butter, or even a tiny pinch of cayenne pepper for a savory kick.
5. Storage
Transfer your freshly made peanut butter to a clean, airtight container. It can be stored at room temperature in a cool, dark pantry for about 2-3 weeks. For longer shelf life (up to 2 months or more), store it in the refrigerator. Natural separation of oil may occur; simply stir it back in before serving.
Beyond Peanuts: Exploring Other Nut Butters
The principles you’ve learned for how to make peanut butter apply beautifully to a wide array of other nuts. The process remains virtually identical: select your nuts (unsalted, shelled, skins removed where applicable), toast them for enhanced flavor and oil release, and then blend until smooth.
You can easily adapt this method to create:
- Almond Butter: A popular choice, offering a slightly sweeter and milder flavor profile.
- Cashew Butter: Exceptionally creamy and rich.
- Walnut Butter: Earthy and slightly bitter, often paired with sweet additions.
- Pistachio Butter: A vibrant green and unique flavor, perfect for gourmet treats.
- Hazelnut Butter: Often blended with cocoa for a homemade "Nutella" experience.
The world of homemade nut butters is truly your oyster, inviting endless experimentation and delicious discovery.
Conclusion
Making your own peanut butter is more than just a culinary task; it's an empowering act of taking control of your food. It’s a testament to how simple, wholesome ingredients can be transformed into something extraordinary with minimal effort. From the incredible ease and cost-effectiveness to the endless possibilities for customization and the undeniable purity of a preservative-free spread, homemade peanut butter simply *is* better. So, clear a space on your counter, grab your peanuts, and get ready to experience the pure, unadulterated joy of spreading your very own, perfectly crafted peanut butter. Your taste buds (and your wallet) will thank you.